Set Up Publishing
Let’s look at how to set up schedule publishing for your account.
Publishing is enabled at the account level first, and then for each schedule.
Account-Level Publishing Settings
Visit the account settings page:
- Log in to the Scheduling Tool as a schedule maker
- Click the Settings link at the top right of the main account page
The publishing settings look like this:
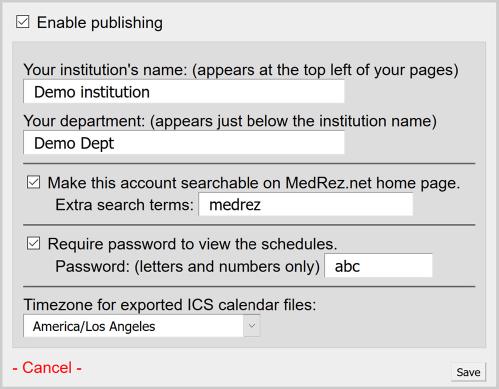
Note: the “Require password” option must be used if Online Day-off and Vacation Requests Gathering is to be used.
When publishing is enabled a web address is displayed in the settings box. This link will not change. You can copy it and email it to your residents and staff. You can also create a link to your schedules on your department intranet or website.
A word of caution: putting a link to your schedules on your department’s website or any publicly viewable website, or making your account “searchable” on the MedRez.net home page without requiring a password means that any person can see your resident’s schedules. This in itself could be problematic. However, in addition to people, internet robots (“bots”) will visit your schedules and copy the contents. This means your resident’s names and schedules will show up in search engines and other places. This could be dangerous for your resident’s privacy.